Recently upgraded my Ubuntu 14.04 server at 1and1 with apt-get update and apt-get upgrade to find out that the server is no longer accessible. Was still able to connect to the server via serial console supplied by 1and1 and found out that the server was having trouble setting up network interfaces during boot process. Continue reading “Loss of networking after apt-get upgrade on 1and1 dedicated server”
Category: Linux
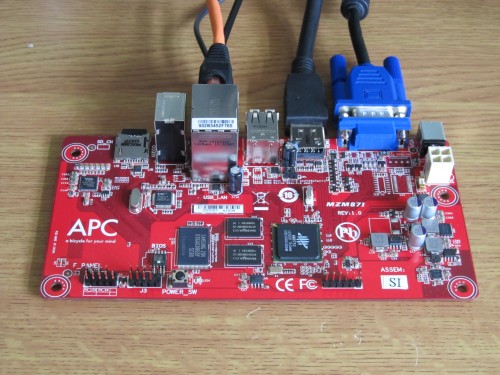
APC.IO – a $49 all in one PC by VIA: a bicycle for your mind or a big disappointment?
There was a lot of excitement in the hardware hacker community back in May 2012 when VIA announced APC.IO – a $49 all in one Android PC. I was excited too, but my excitement quickly faded away when I received my two APC’s a few weeks ago and booted them up…
Forwarding Arduino serial port from Windows host to Linux guest using VirtualBox
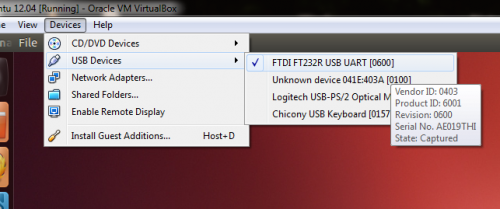
Forwarding Arduino from Windows host to Linux guest is straightforward, just select it from the list of available devices:
Once that’s done, the device will appear as /dev/ttyUSB0. The only problem is that file permissions for the device are 660 so you won’t be able to access the device unless you are root or set the permissions to 666 with
sudo chmod 666 /dev/usbTTY0
Note, that you would have to do this every time you forward the device or start the guest VM.
A more elegant solution exists (at least in Ubuntu). Just add yourself the the dialout group:
sudo adduser your-user-name dialout
Reboot your PC and you will be able to access the serial port without anything extra just by forwarding it to the guest Linux OS.
Mute/Unmute sound in Ubuntu 12.04 using command line
Stumbled over this strange problem with Ubuntu and sound muting using command line interface (CLI). Everywhere on the internet I found that it can be done with amixer:
amixer sset Master mute

amixer sset Master unmute

amixer sset Master toggle
For some reason, muting works fine, but unumuting or toggle has no effect. Upon further investigation I noticed that by muting Master channel, “PCM” and “Master Mono” channels are muted too. Unmuting Master does not unmute those two channels. I could have solved this issue by running a bash script that mutes the sound with
amixer sset Master mute
… and unmutes all channels with
amixer sset Master unmute
amixer sset PCM unmute
amixer sset "Master Mono" unmute
… but what fun is that? You can however mute and unmute with pactl. This requires just a single command line per action:
pactl set-sink-mute 0 1
pactl set-sink-mute 0 0
Raspberry Pi kernel panic
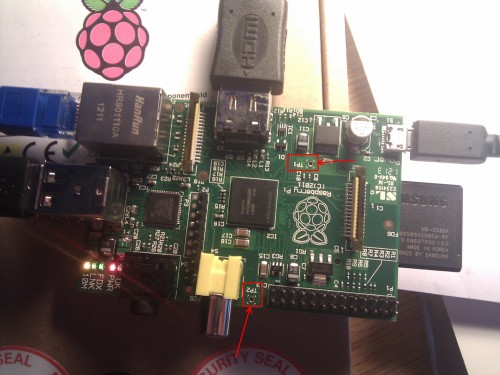
Got a chance to try out Raspberry Pi. It is very impressive of how much power has been crammed into such a small device. While I was doing a simple “apt-get install” command to download and install packages, I started getting messages similar to these with a bunch of kernel debug info:
- “Unable to handle kernel paging request at virtual address …”
- “Kernel panic – not syncing: Fatal exception in interrupt”
Upgrading Thunderbird to version 3 in Ubuntu 9.10
Here is a quick guide on how to upgrade Thunderbird 2 that comes with Ubuntu 9.10 Karmic Koala to glorious Thunderbird 3. Hopefully this will save some lost souls out there. :)
Open Terminal and copy folder ~/.mozilla-thunderbird to the new location expected by Thunderbird 3:
copy ~/.mozilla-thunderbird ~/.thunderbird
All emails, settings and extensions in ~/.mozilla-thunderbird will be your backup.
Get Ubuntuzilla package signing key to your keyring:
sudo apt-key adv --recv-keys --keyserver keyserver.ubuntu.com C1289A29
Add Ubuntuzilla repositories to the list of your sources either by using main menu System > Administration > Software Sources on the Other Software tab:
deb http://switch.dl.sourceforge.net/project/ubuntuzilla/mozilla/apt all main
Hit Reload button when asked to update software list.
Alternativelly the above step can be done with the following two commands in your terminal:
echo -e "\ndeb http://switch.dl.sourceforge.net/project/ubuntuzilla/mozilla/apt all main" | sudo tee -a /etc/apt/sources.list > /dev/null
sudo apt-get update
And finally you can install the latest version of Thunderbird by running the following command:
sudo apt-get install thunderbird-mozilla-build
Don’t forget that you can erase the folder ~/.mozilla-thunderbird if the upgrade was successful. Have fun using the best email client in the world – Thunderbird 3! You can find it in the main menu Applications > Internet > Mozilla Build of Thunderbird.


